Hooking Android Applications With Frida
Today I’m going to talk about a very powerful binary instrumentation toolkit named Frida,
And use it to investigate and solve an android crackme app.
Note: I’m going to assume that you already know how to connect to an android device or emulator via adb.
What is Frida?
Frida is a binary intrumentation toolkit, that lets you inject JS code or your own library into native apps on almost every possible platform (Window, MacOs, Linux, IOS, Android and QNX). Frida’s core is written in C and has a fairly simple API for multiple languages such as Python, C, Swift, .NET, Node.js, Qml, etc..
For more information look at the official website.
Installation
First of all if you don’t have frida installed yet, go check this installation guide:
https://frida.re/docs/installation/
Now let’s install frida-server on our android device.
Installing frida-server
Download the latest frida-server from here: https://github.com/frida/frida/releases
Note: Make sure that you get a server that matches your device architecture.
after extracting the archive, upload the server to the device via adb with the following command:
adb push frida-server /data/local/tmp
next we need to get a shell and get the server running.
adb shell
su
cd /data/local/tmp
chmod +x frida-server
./frida-server &
Installing the crackme
Download the crackme from here:
https://github.com/OWASP/owasp-mstg/tree/master/Crackmes/Android/Level_01
And install on the device:
adb install UnCrackable-Level1.apk
Let’s Get Started
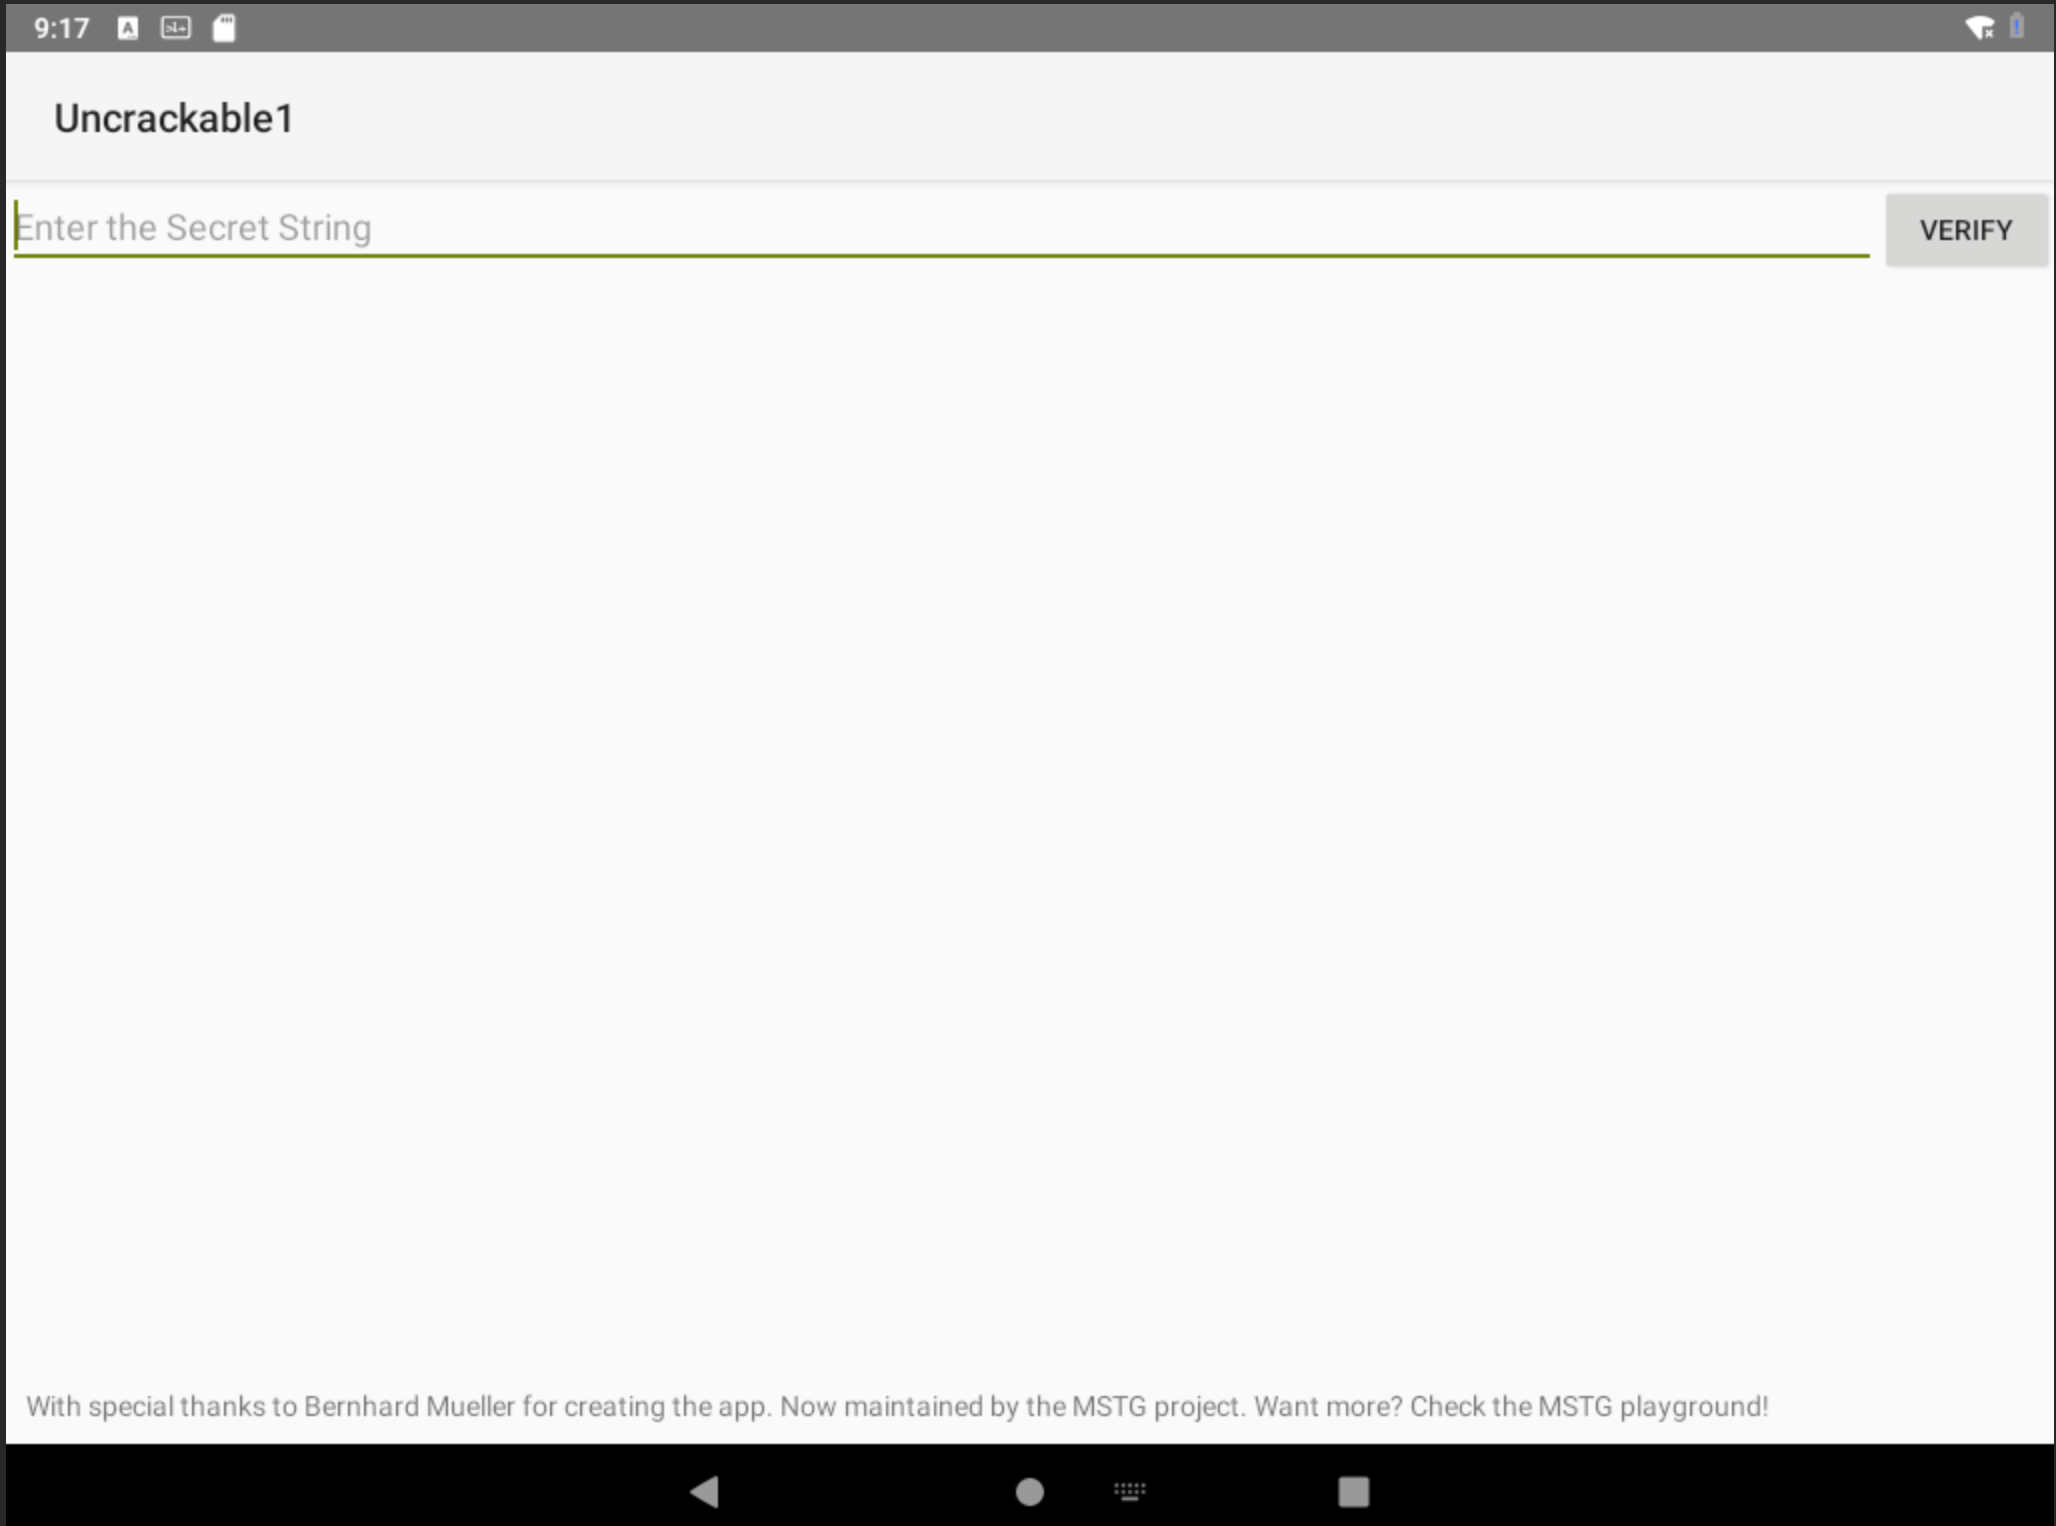
First, let’s launch the app and see what it looks like.
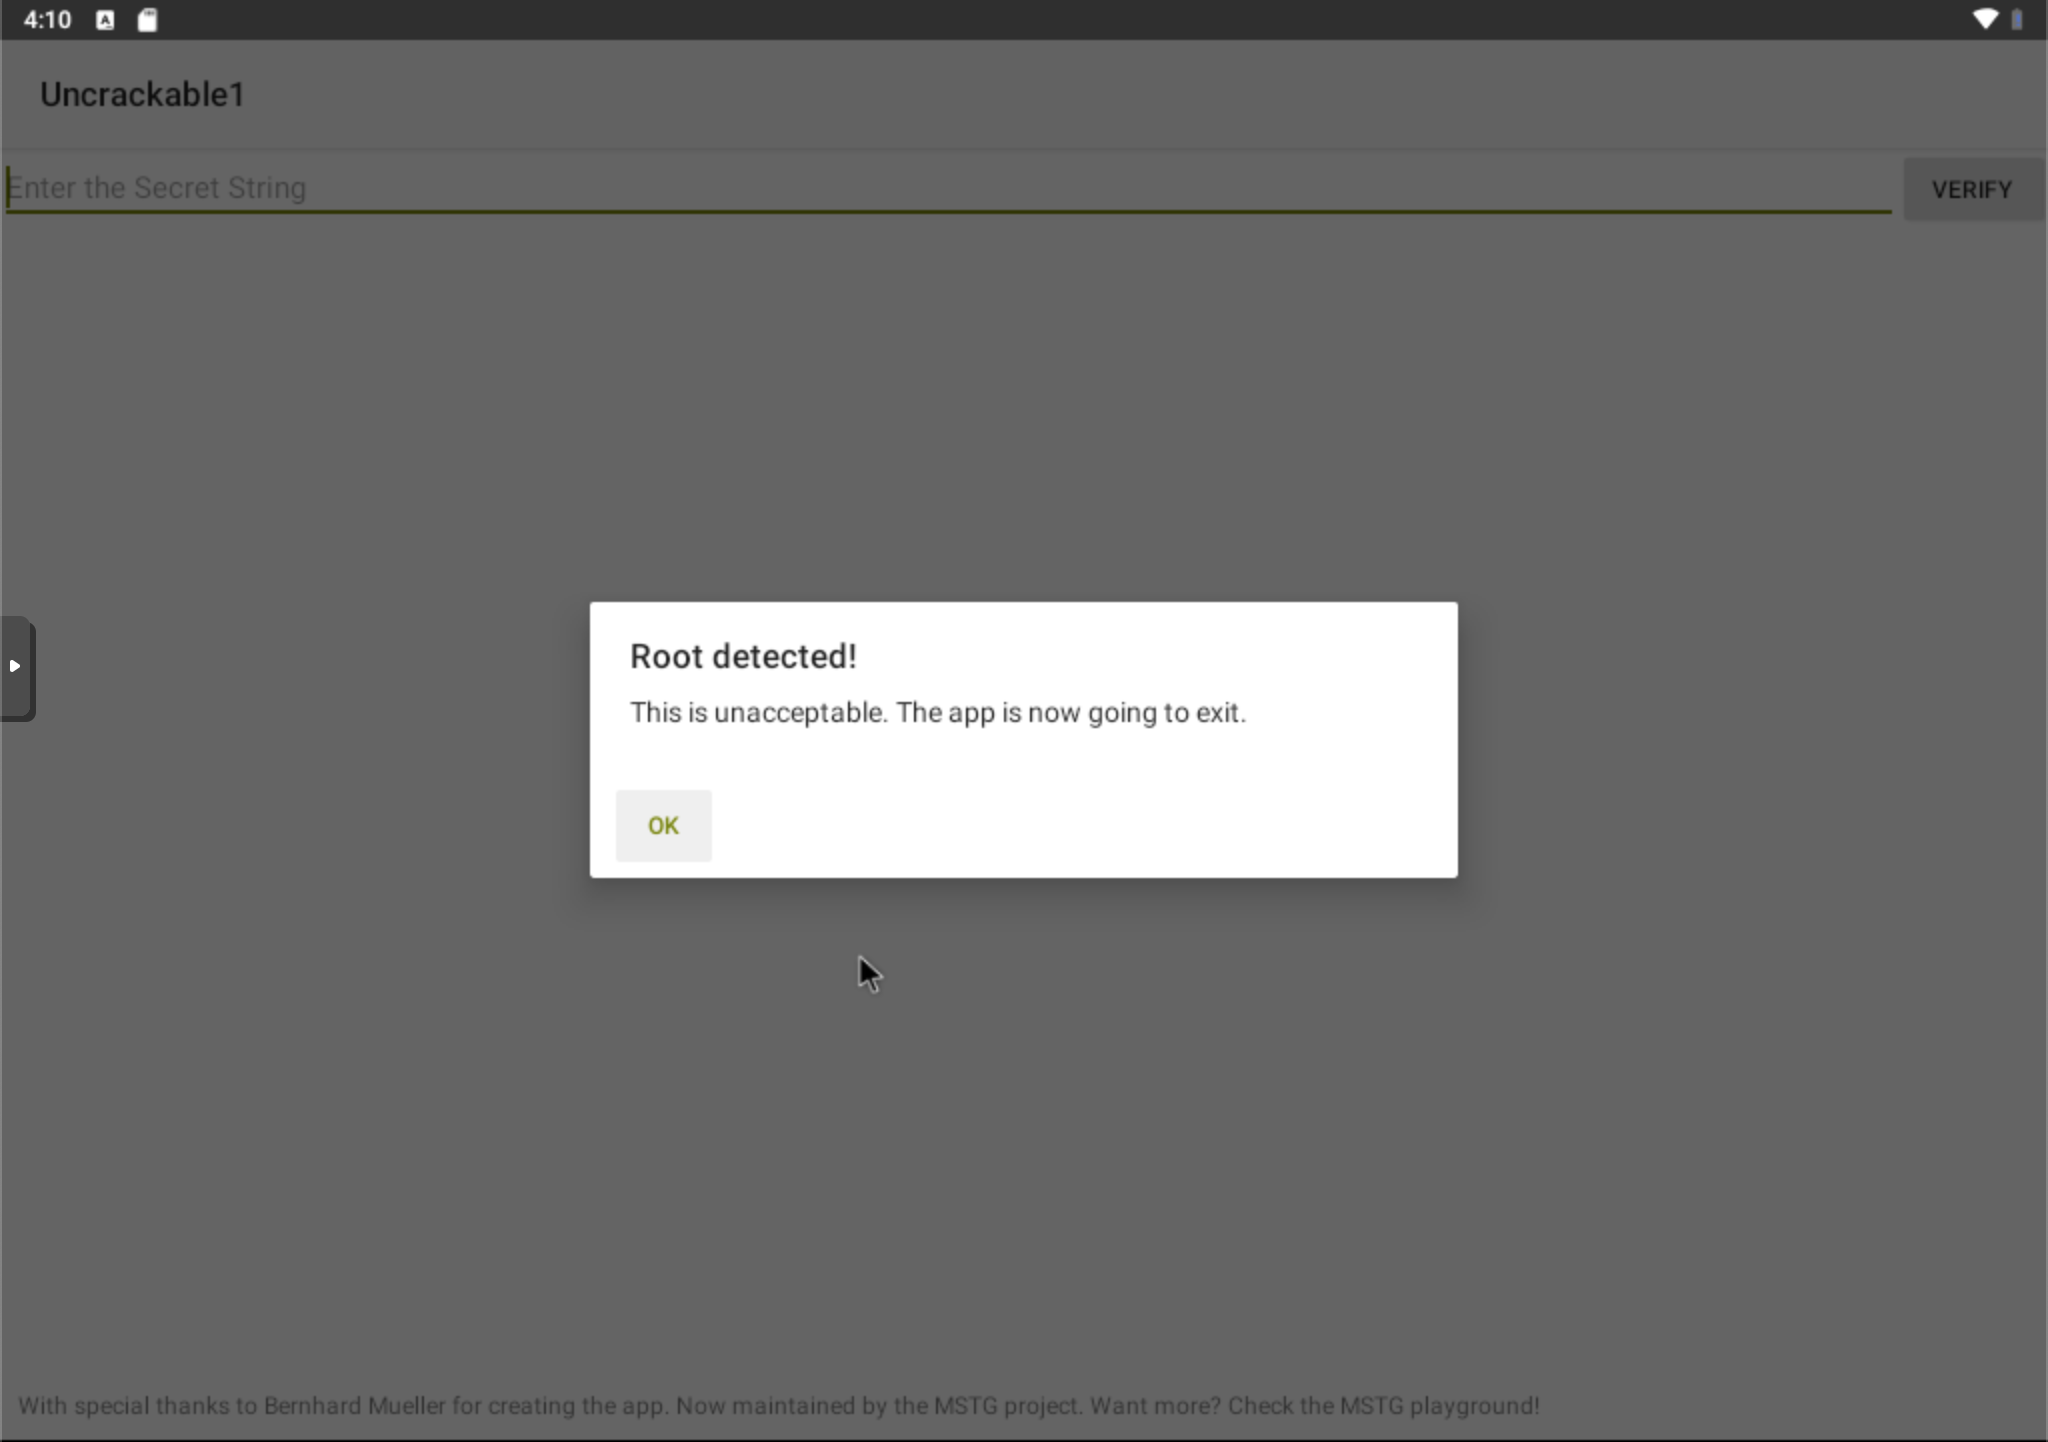
Ok.. It seems like a simple login page with a secret password, but inorder to enter an input we need somehow to bypass the root detection.
Let’s unpack and decompile the app and see what’s going on.
For unpacking we can use dex2jar:
d2j-dex2jar UnCrackable-Level1.apk
Now you should have a JAR file. Let’s decompile and view it with JD-GUI.
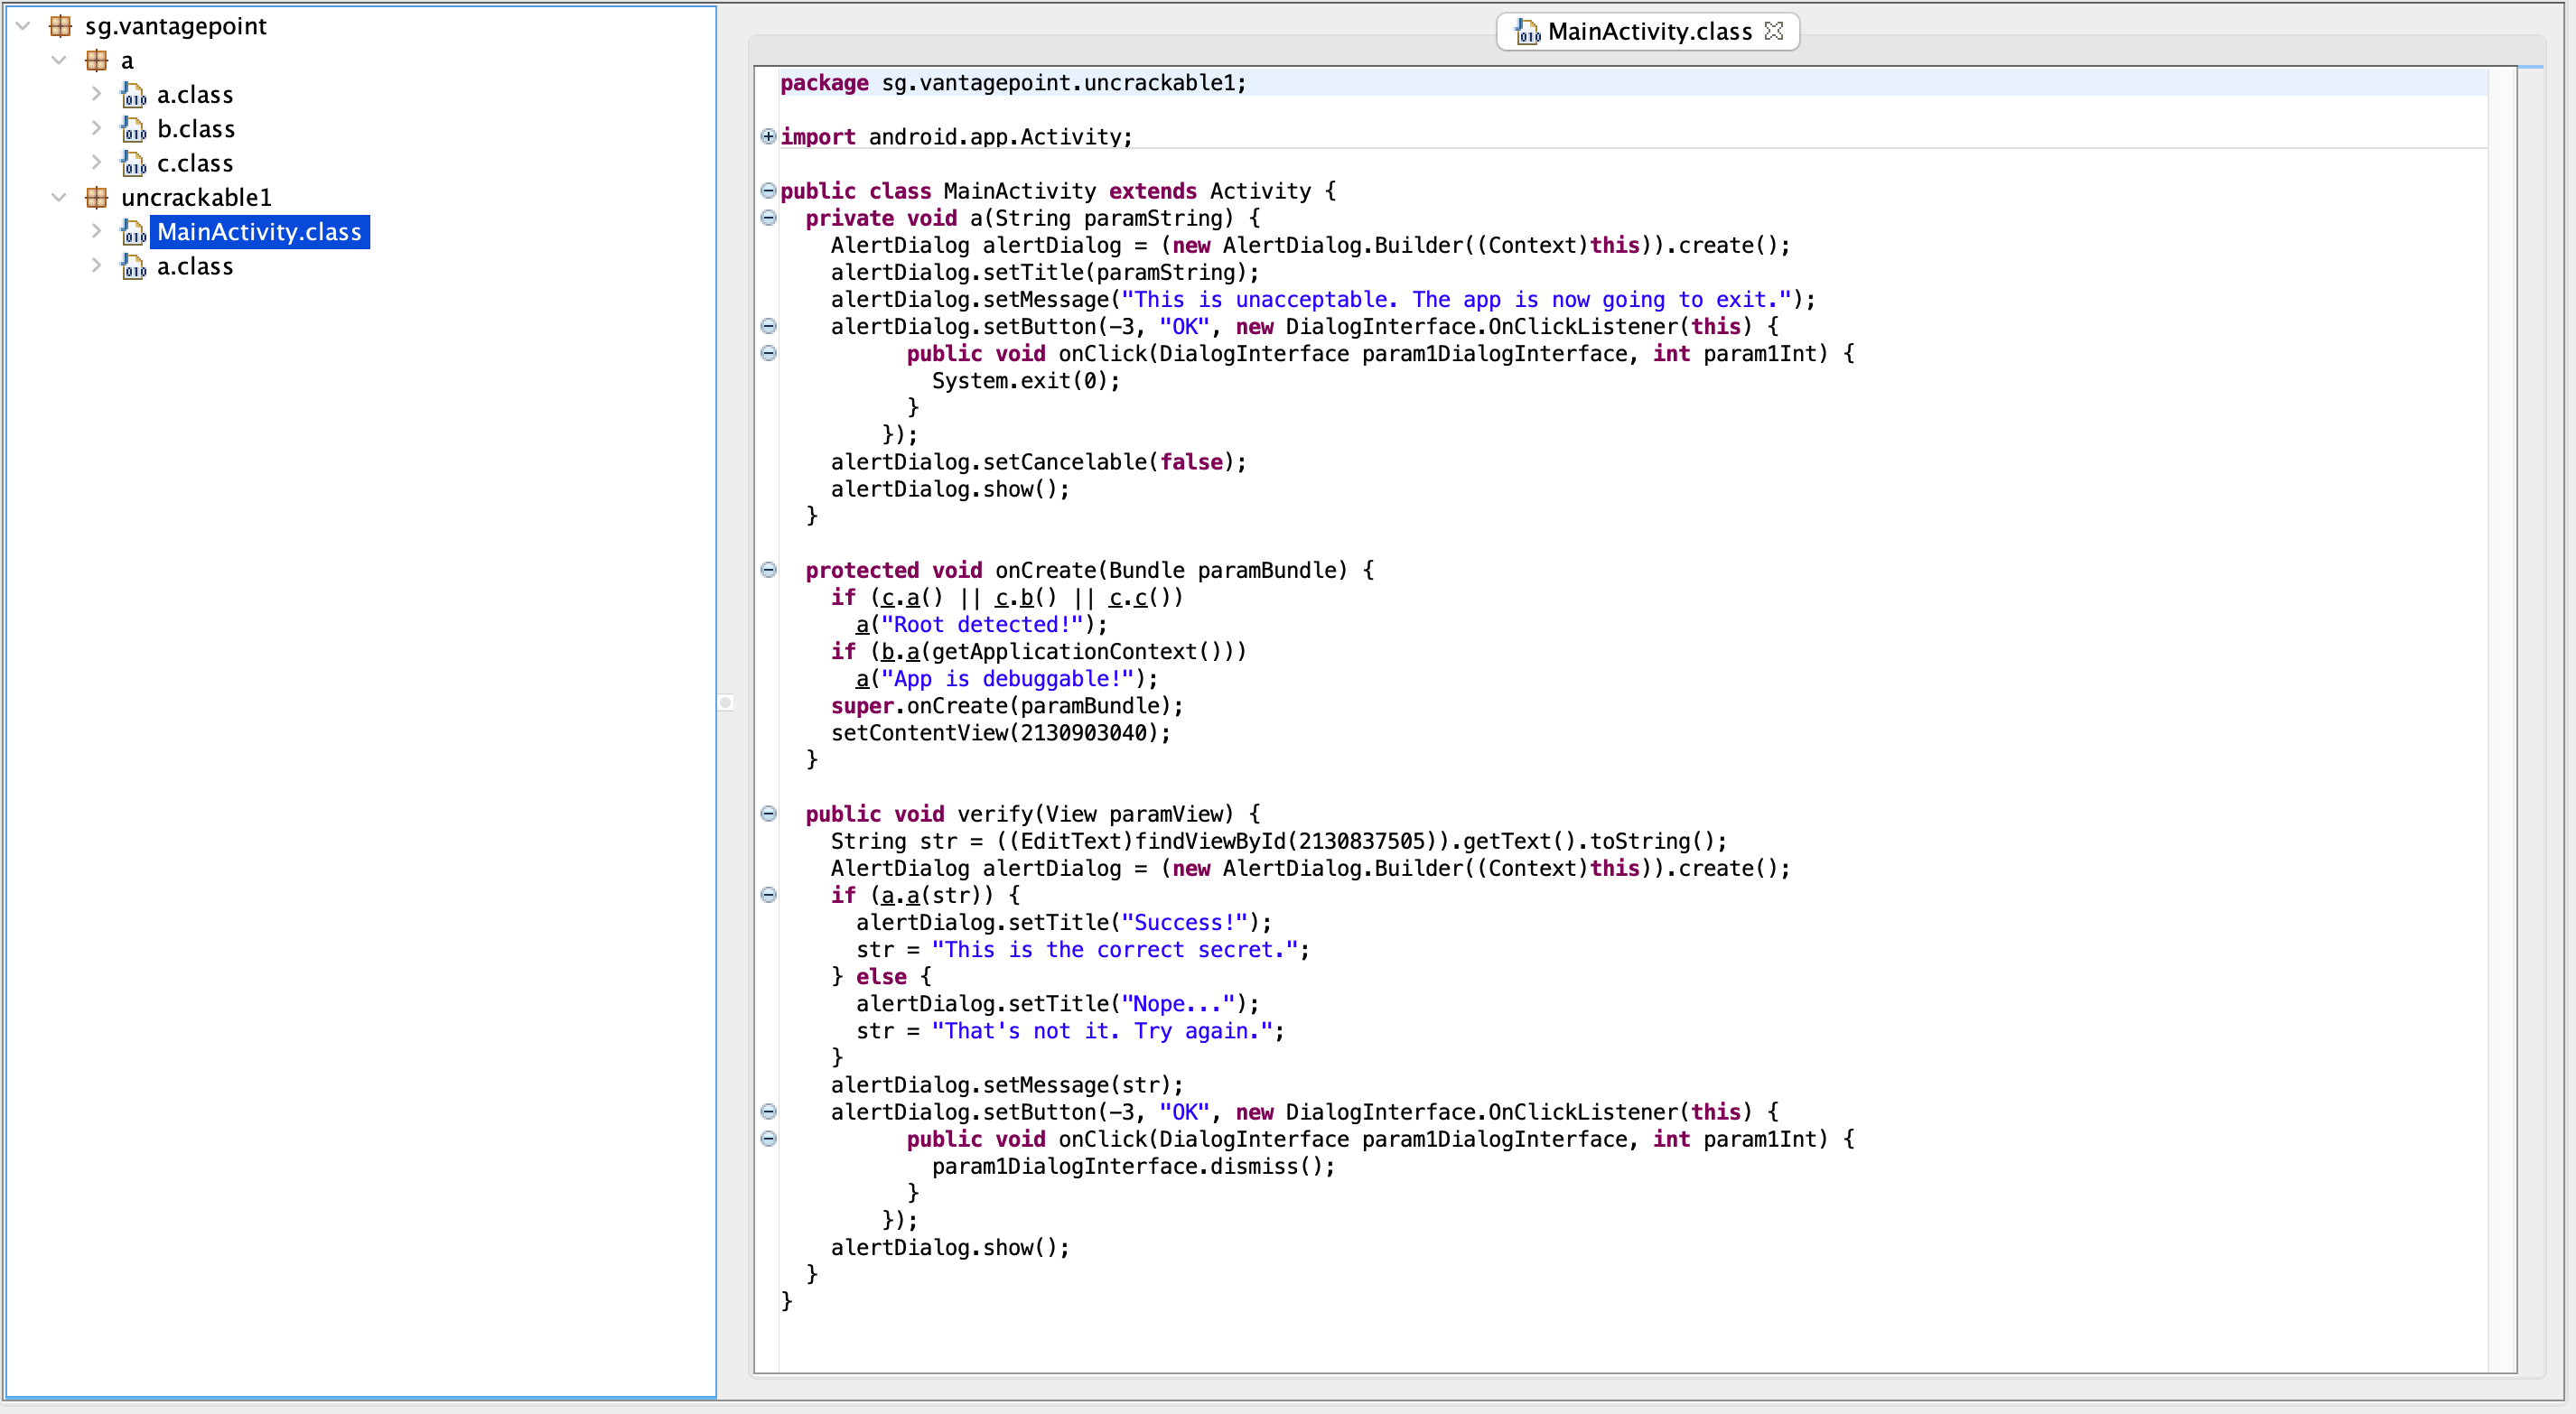
Bypassing The Root Detection
As you can see in the image above, there is a function named onCreate that is incharge of the root detection.
  protected void onCreate(Bundle paramBundle) {
    if (c.a() || c.b() || c.c())
      a("Root detected!");
    if (b.a(getApplicationContext()))
      a("App is debuggable!");
    super.onCreate(paramBundle);
    setContentView(2130903040);
  }
Inorder to bypass it we need that all of the functions inside the if statement will return false.
Let’s take a look at their code.
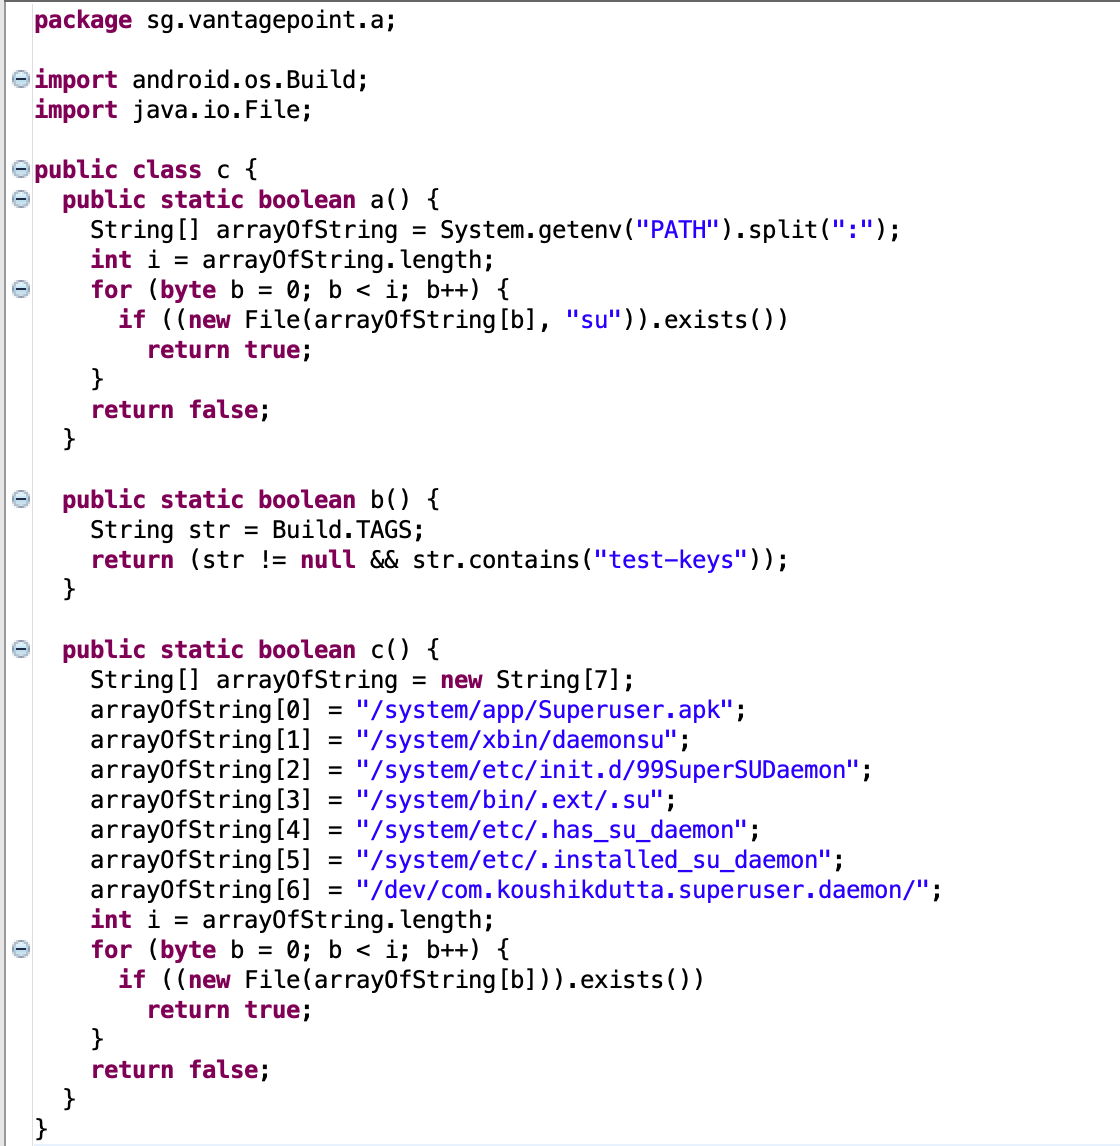
So we got three different checks:
- a: checks if
suis in one of the directories of the PATH enviroment variable. - b: checks if the kernel is signed with test-keys instead of release-keys.
- c: searchs for rooting apps.
One way we can approach this is by using Frida to change the implementation of those functions in a way that they’ll always return false.
How to modify functions with frida
The first thing we should do is to check whether our process has Java VM running.
for this we can use the boolean Java.available.
It is also recommended to use Java.perform(fn) to ensure that the current thread is attached to the VM.
The next thing is to get an instance of the functions class.
For this we can use Java.use(className).
Now that we have an access to the class we can use the implementation method on our function
to replace the function implementation as we want.
    if(Java.available){ //check if java VM is running.
        Java.perform(()=>{ //ensure that the current thread attached to the VM.
            var root_detection_cls = Java.use('sg.vantagepoint.a.c'); //get the functions class

            //replace the functions implementations
            root_detection_cls.a.implementation = () => {return false};
            root_detection_cls.b.implementation = () => {return false};
            root_detection_cls.c.implementation = () => {return false};
        });

    }else{
        console.log("Java VM is not running..");
    }
And thats it. Now we just have to inject the script.
For more information about frida’s Java API look here: https://frida.re/docs/javascript-api/#java
injecting our script
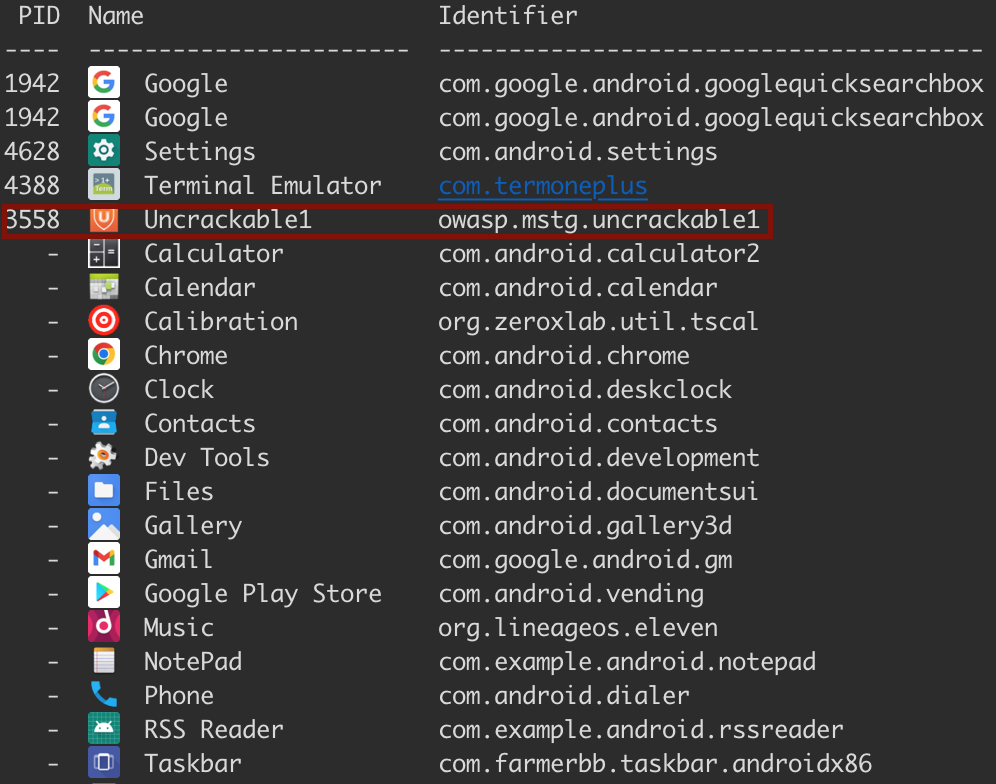
Before we start we need to get the application package name. frida comes with a useful tool that can help us with that.
run the following command:
frida-ps -Uai
-U is for usb device, -a is for showing applications and -i is for showing all the installed applications.
Now we inject our script.
frida -U -f owasp.mstg.uncrackable1 -l injector.js
You should see that our app has launched in suspended mode. enter the %resume command to resume the app.
And.. we passed the root detection.
Decrypt the password
Now that we passed the root detection we can interact with the app. The app asks for a ‘Secret String’, so let’s look at the code and see how we can get it.
If you look again at the MainActivity class you’ll notice the following method, called verify.
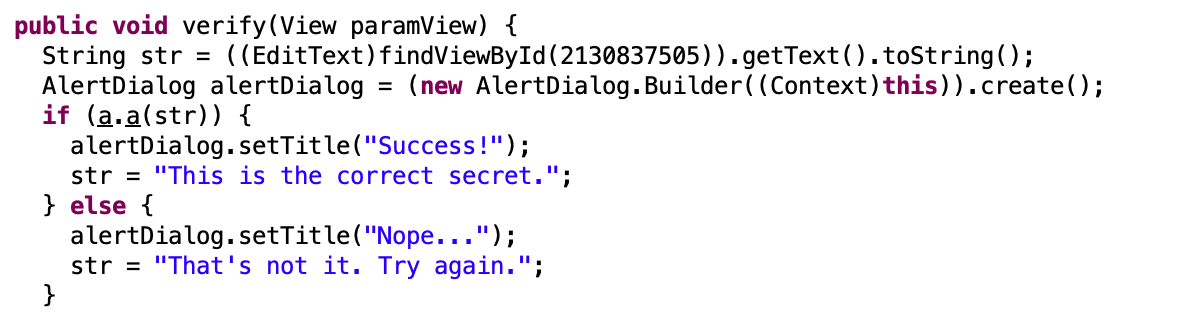
As you can see inorder to reach the Success message we need to get true from the method a in the class a (in the uncrackable1 package).
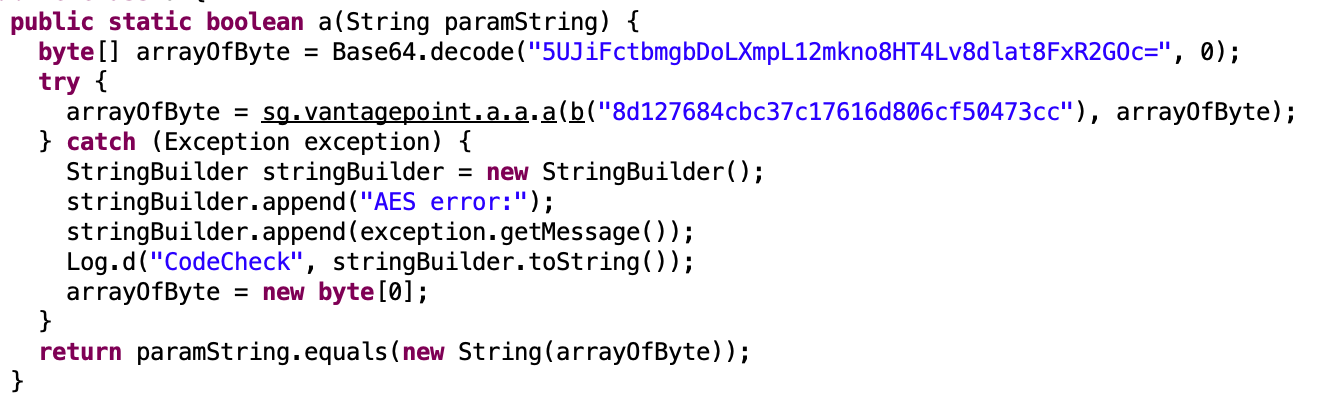
sv.vantagepoint.a.a.a:

So we see that our input is compared with the secret key after its being decoded from base64 and then decrypted with AES-ECB using hardcoded key.
Ok, so there are many ways to approach this. we can change the behavior of the method a to return always true so any input would work. We can put a hook on the function that decrypts the secret and print it, and so on..
I think that it will be more interesting to show how we can use frida to change the flow of the app in such way that we call those methods by ourselves and decrypt the key before even inserting the input.
Solution:
'use strict'

if(Java.available){
    Java.perform(()=>{
        const check_root_class = Java.use('sg.vantagepoint.a.c');

        //bypass root detection
        check_root_class.a.implementation = () =>{ return false;};
        check_root_class.b.implementation = () =>{ return false;};
        check_root_class.c.implementation = () =>{ return false;};

        /*
            after bypassing the root check, the app ask for a secret string.
            With quick static analysis we can see that the app stores an ecrypted string that was decrypt by using AES128-ECB
            and then decoded with base64.

            The verify is checked by decrypt the secret string and compare it with our input.
            To solve this we can use frida to call the decryption function and print the desired secret message.

        */

		//get the classes
        const serial_class = Java.use("sg.vantagepoint.uncrackable1.a");
        const base64_class = Java.use("android.util.Base64");
        const aes_class = Java.use("sg.vantagepoint.a.a");

        var hex_key = "8d127684cbc37c17616d806cf50473cc";
        var enc_msg_b64 = "5UJiFctbmgbDoLXmpL12mkno8HT4Lv8dlat8FxR2GOc=";

        console.log("[+] decoding the encrypted secret: "+enc_msg_b64);
        var enc_msg_bytes = base64_class.decode(enc_msg_b64,0);
       // console.log("    got: ["+enc_msg_bytes+"]");

        console.log("[+] convert the key into bytearray: "+hex_key);
        var bytes_key = serial_class.b(hex_key);
        //console.log("    got: ["+bytes_key+"]");

        console.log("[+] decrypting.");
        var secret = aes_class.a(bytes_key,enc_msg_bytes);
        console.log("[*] the secret is: " + String.fromCharCode.apply(null,secret));


});
}else{
    console.log("Java is not available.");
}
Look how simple it is, We can get the class by using Java.use and then just
calling its methods.
Lets run this and see what happends.
run:
frida -U -f owasp.mstg.uncrackable1 -l solution.js --no-pause
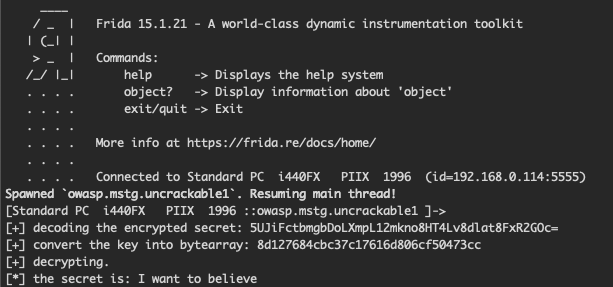
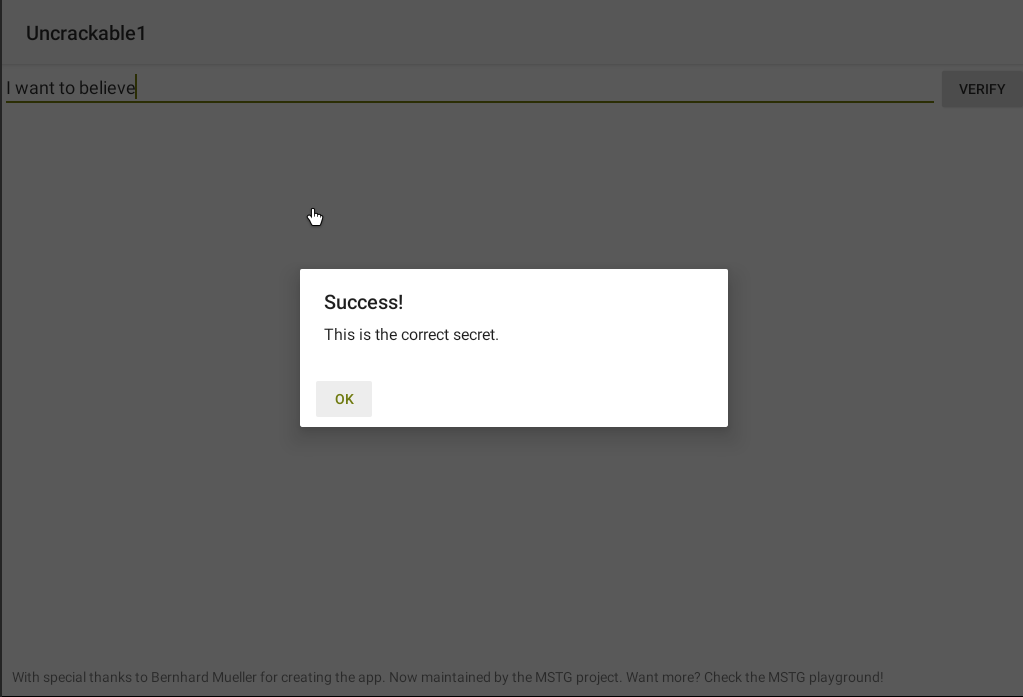
We got it!
secret: I want to believe